Sunday, October 26, 2014

Quilter attempts to sew with a stretchy fabric

Recently I saw a couple of posts on IG of some simple topknot baby hats and I got inspired to try to sew some up. I have never sewn with knits before and had a pretty good idea that this wasn't going to go well. A baby hat is a good place to start though - it is a quick project and babies don't care if their hat looks good or not.

I used this tutorial and the only knit fabric I had on hand (a very cute bird print). And voila!! Look a hat. It took less than an hour. Probably less than 30 minutes. If you actual know what you are doing you could whip one up in 15.


The only problem is it stretched SO much. It is a big hat. The hat is supposed to fit a 0-3 month old head. See my hat next to a store bought hat for the same age range:  


Or superimposed:

As a quilter I can deal with blocks that are too small. I get it, my 1/4" seam wasn't accurate and now my blocks are small. But final products that turn out larger than intended...odd. The hat's template pieces were 7.5" at their widest and sewing them together with a 1/4" seam should yield a 7" hat. Nope my hat is 8" wide. I must have pulled the fabric too much when I sewed it together. Oh well. Hopefully my kids will have big heads like their dad. HA! 

I was too discouraged to make two more hats. I think I'll stick to woven fabrics. Thankyouverymuch. What about you, are you ambidextrous when it comes to sewing with different fabric types or are you a one textile loyalist?

Friday, October 24, 2014

Scrappy Windows {A Finished Quilt}

I like really big lap quilts. The kind you can really wrap around your whole body as you veg on the couch. No having to chose between cold toes or cold shoulders.

My best customer, aka my Mom, asked me to make a quilt for her friend. This friend had seen some of my baby quilts and expressed a desire to have her own handmade quilt. My mom gave me little instruction on the design only saying that it should be "lap sized" and "colorful."

I chose to make some scrappy monochromatic rectangles by sewing scraps together willy-nilly and then cutting it down to 6 x 12" because that is one of the ruler sizes I have. Then I added borders to make 14" square blocks. The colored rectangles were bordered by white/cream/ or gray solids and the neutral rectangles were bordered by colored solids. This was a great scrap buster.


I used some black and white prints as well as a pop of purple for the back. My mom's friends all seem to love purple.

I chose a yellow lightning bug print for the binding. I think it contrasts well with the back and adds a bright and sunny finish to the front.

We took all these photos in a parking lot just before dropping my mom off at the airport to head back home. A last minute finish indeed.

Scrappy Windows
SIZE: approximately 52" x 68"
FABRICS: various itty bitty scraps, solids mostly kona or connecting threads. Backing B/W prints are from Modern by Robin Zigone. Print is metamorphosis from the Cocoon fabric line by Valerie Wells
QUILTING: Large scale meander by FMQ on my home machine with Aurifil 50wt  #2000

Linking up with Crazy Mom Quilts. Happy Friday!!

Sunday, October 19, 2014

Baby Shower Gifts

My hubs coworkers threw us a co-ed baby shower a few weeks ago. It was amazing and so many of his co-Interns showed up despite barely knowing us and their busy schedules. I wanted to express my gratitude the best way I know how, handmade gifts of course! 

I made 6 boxy bags for the six ladies who coordinated the shower. I used a bunch of different fun prints and zippers and let them choose which one they wanted to take home. The boxy bag tutorial is a free one by Kelly at Kelbysews. It is very fast and easy. Even if you are afraid of zippers you should try this one out.

I used quilting cotton for the inside and outside fabrics. The outer panels were quilted using some scrap batting. I used a different quilting design on each bag to complement the fabrics. These were pretty soft still and didn't hold their box shape that stiffly. If you want a stiffer bag use heavier interfacing and a heavier home dec weight fabric for the outside of the bag.

1. Parisville outer fabric with FMQ clamshell quilting, Allison glass inner fabric and a purple zip
2. Jay McCaroll (center city? or the line before?) outer fabric with zigzag quilting and a dark gray zip
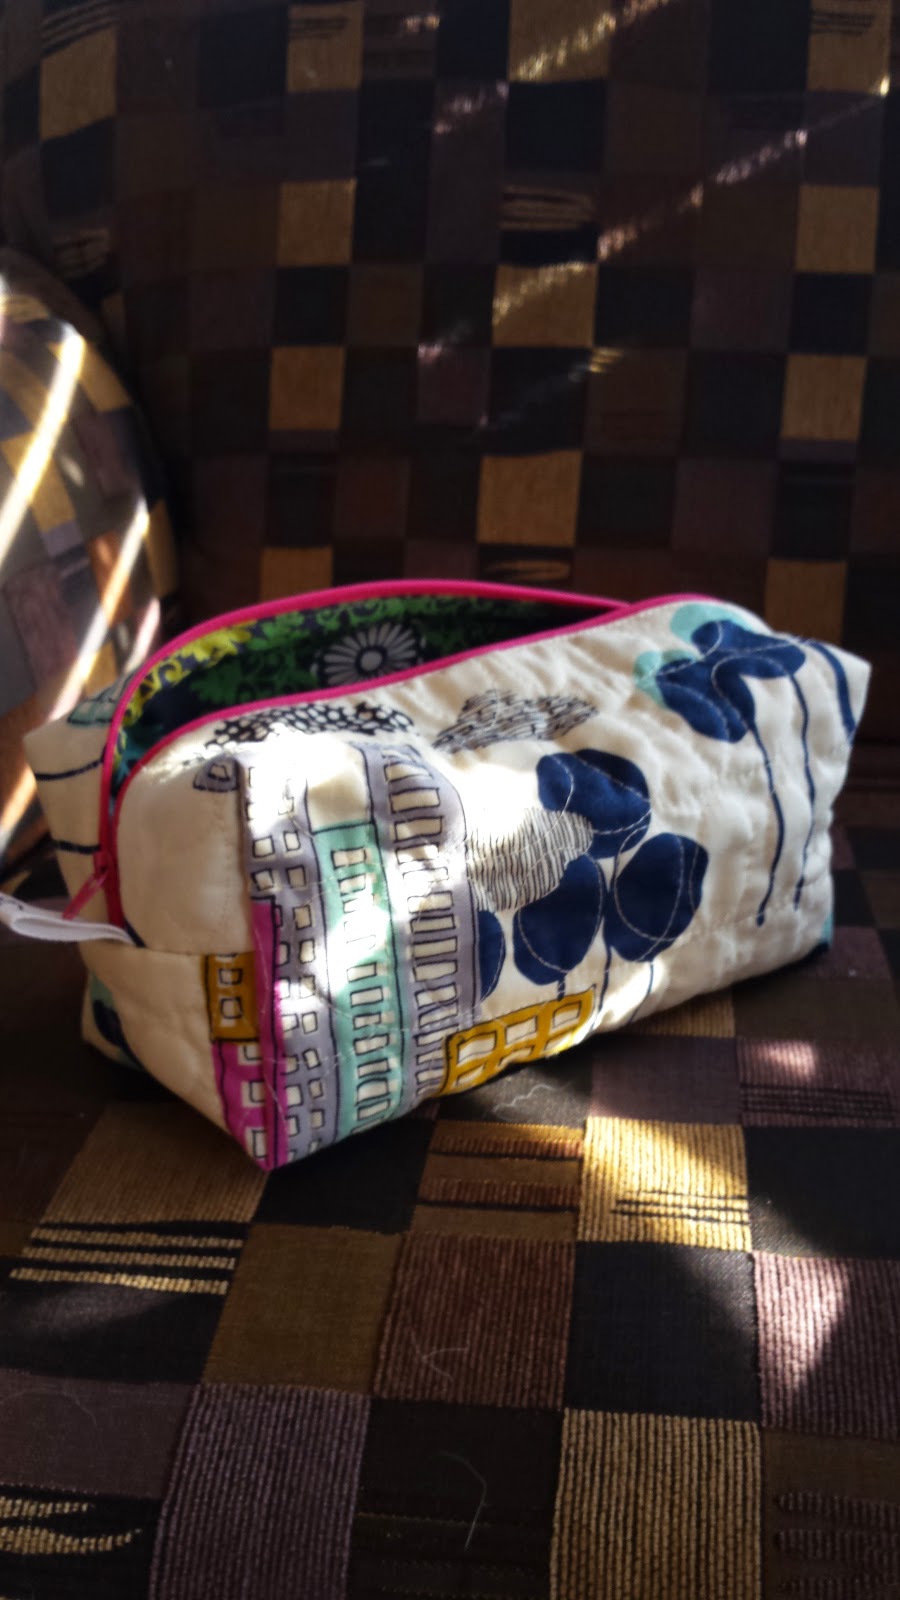
3. Alexander Henry Mercer print with FMQ loops, inner fabric from Hobby Lobby, hot pink zip
4. Hedgy outer fabric (forgot the designer, bought in Korea) with crisscrossed straight line quilting and a blue zip
5. Map outer fabric (also from Korea) with grid quilting, rock'n'romance inner fabric and a purple zip
6. Kona modern quilts print with wavy line quilting, blue zig-zig inner fabric, blue zip.

A word of caution. Make sure you follow the instructions on how to position the zipper when sewing it to the bag panels. I spent about an hour carefully pinning all my zipper sandwiches only to realize after I sewed the first one that they were all in backwards! Oh well, at least I only had to unpick one and simply flip the zipper and repin the rest.

Another fun tip that saves you time is to use some twill tape or ribbon for the side tabs instead of making them from fabric. I used up some twill tape from a recent Birch fabric order. I realized afterward that a quick glance at the bag and you may read bitch instead of birch. Ha, hopefully these girls have a sense of humor about it. I wouldn't mind having a bitchin' bag.


The ladies loved the bags. It was just a small way to say thank you. I hope they realize how much the shower meant to me. Because hubs and I just moved to St Louis, we don't have many friends in the area and our families are too far away to plan a shower. If his coworkers hadn't thrown us a shower we simply wouldn't of had one. 

This bag is perfect for handmade gifts for so many reasons. It is a versitile bag, perfect for makeup, colored pencils, nail polish kit, etc and can be made quickly. It is a great way to use some of the larger print fabric in your stash and all that scrap batting I know you have piled in a corner somewhere. I keep a bunch of zippers around in a multitude of colors so I can whip up a pouch or bag whenever I want. What is your go-to pattern for handmade gifts?

Saturday, October 18, 2014

Last of the bee blocks round up for 2014

This year I was lucky to participate in a flickr quilting bee, That Stash Bee where participants make two quilt blocks for another member shopping their own stash for just the right fabrics. Here's a round up of all the block I made for the rest of the year.

September: Pineapple blossom blocks for Michonne. She picked a great palette. I'm a sucker for purples. I love this block especially the star it makes when four blocks come together. A big quilt with this block is on my to do list.

October: Katie asked for Halloween maple leaf blocks from McCalls. These were so much fun and I can't wait to see the finished quilt. I loved finding the perfect center pieces. The froggy one is from a friend's grandmother's stash.
 

The second one has a Heather Ross print. Not sure why kids in costume are going to a parade of books but I endorse it. PS. The skeleton fabric glows in the dark! 

November: Toni (our bee hive mama) kindly gave me the instructions for Novembers blocks way ahead of time so I could get them to her before the babies come. She chose the July Star block from Cluck Cluck Sew. These are made large and then you trim them down to size, always a good idea with bee blocks because everyone's quarter inch seam is always a touch different. She chose a patriotic color scheme which I found really refreshing. I love using bold colors. Plus I got a chance to use this darling sailboat 30s repro fabric in the center.


Feels good to know I am done with my sewing related commitment for the year! I love picking out fabrics, trying new block designs, and sewing for others but HATE going to the post office. 

Friday, October 17, 2014

Two Girly Baby Quilts

In less than two months I will have my hands (instead of my belly) full of triplet boys. I made them each a quilt which will be blogged about soon. After making all of the boy quilts I was really itching to make something super girly, so when I found out that a new friend had identical twin girls a few months earlier I just had to make some quilts for them.

I wanted the quilts to complement each other but not be too matchy-matchy. I went with a triangle theme. The first one is made up of  equilateral triangles. 


I used up the last of my Simpatico fabric for this quilt and threw in a few other complementary prints. With light pinks, orange, yellow, and a hint of mint, the palette is very soft which really goes against my normal aesthetic. It was so hard not to throw some hot pink or electric blue in there.


I echo quilted the triangles which creates a beautiful grid and bonus stars at the junctions where 6 fabrics meet.

For the back I chose a world map print I picked up in Korea. It matches the colors on the front perfectly. I also appliqued an "M" for the baby so she can remember that THIS quilt is HERS and that her sister cannot have it.The binding is a blue polka-dot. 


For the second quilt I used triangles and big hexagons to make a star pattern. I stuck with a similar color scheme: pink, yellow, and light blue, but couldn't help going a little bolder on the prints this time. Plus teapots!

One of the hexagons is framed in a blue stripe print so that you can really see the secondary star design. The rest of the blue is a little snowflake print. Because the hexagons were so big, I got a chance to use some of my larger scale prints. Love those big yellow flowers.


Because I was dealing with a simpler patchwork I went bananas on quilting it. I chose to do some FMQ paisley feathers for the first time. I was emboldened by Angela Walters video tutorial  and baby quilts are the perfect place to practice designs. It created such a lovely texture and looks a lot harder than it was to execute. Just look at that texture. Mmmmm. 


 For the back I chose some flea market fancy, once again appliqueing a "T" so that you can tell the quilts apart (I am hilarious). The binding is made of the same cross-stitch letter fabric that I used for the monogram applique.


Now you can see that the back of the quilts are opposite of one another: blue with a cream binding, and cream with a blue binding.

The fronts of the quilts also go nicely together. I can't wait to see pictures of the little girls playing on their quilts.

I'm linking up with Crazy mom Quilts Friday finishes, for like, the first time in foreverrrrrrrrrrrrr. Happy Friday!!

Tuesday, September 2, 2014

Stash Bash Pouches 2014 Edition

You may recall the pouches I sewed up for the 2013 Stash Bash. I made one for a bag swap and two others afterwards. This year I sewed up a medium sized pouch for my secret swap partner Jenn Thurston who runs the Quilted Thimble Cottage fabric shop. I used some fabric leftover from a quilt I made at the 2013 Stash Bash and pieced a little wonky star. The bottom is a gray grunge. 

The stripes wrap around the back and I machine embroidered on both sides so she would forever be reminded of a great weekend. 


I filled the pouch with goodies including chocolate, twizlers, pens, post it notes, twine and washi tape.

It barely fit in the pouch but that is just how it should be.

We got a mini charm pack of Kona solids at the Stash Bash. When I got home I couldn't wait to play with these perfect little squares. I decided to make another open-wide pouch (free Noodlehead tutorial) and send it to Chris (The Stash Bash Goddess Coordinator and puppy rearing queen) as a thank you for once again putting on a stellar retreat. The layout is a simple 4 x 7 grid on the front with a little hand-stitched embroidery. 

The back is made up of a few coordinating prints:
I failed photography 101 as you can see my shadow in most of the pictures. I also don't care one iota.

I just HAD to line the pouch in teapots:

Monday, September 1, 2014

The Stash Bash 2014

Who wants to hear my recap of a sewing retreat from last May? Totally! The 2nd annual Stash Bash was amazing. Recap from the inaugural Stash Bash can be found here. Chris (aka Frecklemama) is my kind of event planner. She made the event so much fun while still being laid back and relaxing. The concept is sewing in a beautiful location...


...in a huge room overlooking the lake. And you are with about 50 like-minded people who want nothing but to chat, sew and eat sweets. There were occasional breaks for meals (in between eating sweets) and a fabric shopping trip to the Scarlet Thread was optional. I didn't go to the fabric store this year because I wanted to sew, sew, sew the whole time.


The dining room is right next to the sewing room so there is pretty much no travel time needed to eat and then get back to sewing ASAP. Bonus - you could hold a mock UN meeting here.

There was a large seating arrangement at the far end of the dining area. This was the perfect spot to take a break or do some hand stitching. 

There was also ample floor space for laying out monster quilts like my string-a-hex quilt.


Like last year, I camped out in the back corner with Katie (Katie's Korner) and Elizabeth (Don't Call Me Betsy). We were missing Kim (who had to go and move to California which was tragic) but still managed to have loads of fun and get lots done. I pieced the top of my string-a-hex quilt (above pic), finished two totes (only took a pic of one), caught up on my bee blocks, and started cutting out a courthouse steps quilt. Not bad for a weekend!

Commissioned bag for a family friend.

Churn dash bee blocks.

Chinese lantern style courthouse step quilt.

The swag haul from this year was seriously amped up from last year. But sadly I didn't take a picture of my goodies all together. But we got lots of fabric from Moda, Stash Fabric and elsewhere, an Olfa splash rotary cutter, an Omnigold square ruler, an official The Stash Bash screen printed tee and a lot more things that I don't remember seeing as I am writing this post months later. Everyone won prizes (I think at least twice) lottery style. I got some soak nail polish which lasts forever when you paint your nails. I also got another T-shirt with a sewing machine on it and it says "power tool" underneath. It is neon green and awesome.


More goodies were received via the Secret Agent Swap. I remember it being called the Secret Ninja Swap but apparently I was wrong. Anywho...I got all of these lovelies and more from my secret agent during the course of the weekend:

99.9% sure I am not making it to The Stash Bash in 2015 which makes me very sad, but I will have 4-5 month old triplets and apparently they won't be independent functional members of society yet. Plus, since I moved to St. Louis it is not a quick 3 hour drive to the retreat like it was in years past. As much as I may want a weekend away to relax, sew and catch up with old and new friends it is just not going to happen. Maybe 2016??