Monday, December 31, 2012

Hundred Day Hustle Wrap Up


Time to see how the last 100 days of the year went for me. I didn't finish all my list but it got a lot longer (as predicted). Here are the links to my original post and halfway point update.

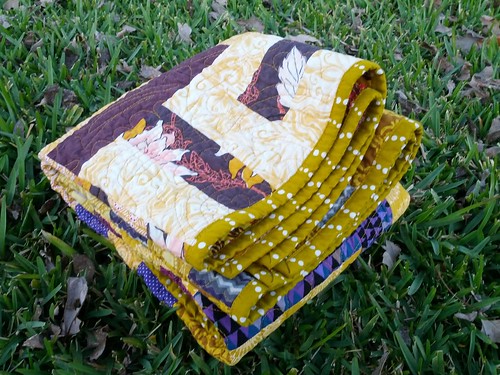
Finished Projects - click on the links to see the full post about each project. I made 6 quilts!

Tales of Earth and Sea

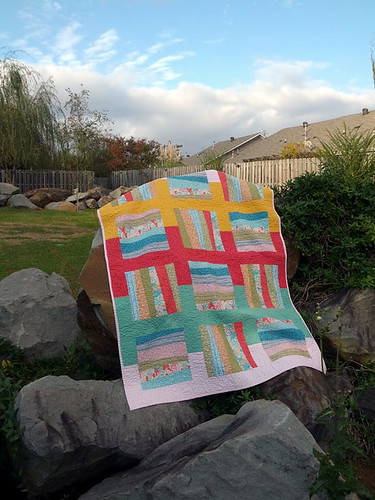
2. Sakura quilt for my Bubby. She absolutely adores it and assures me she uses it every day. I don't want my quilts to go unused in a closet somewhere or just displayed for fear of getting them dirty. I make sure to stress they are machine washable and meant to be used.

Sakura


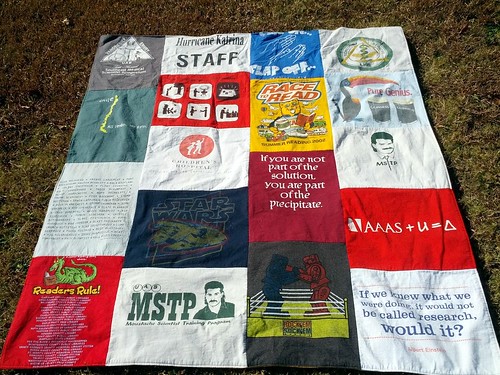
3. t-shirt quilt. I didn't even add this to the list originally because it was in an embarrassing heap of t-shirts at the beginning of the hustle but I got a spurt of energy to make it and it only took one day!

T-shirt quilt (hubs side)

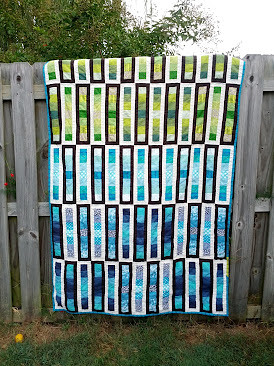
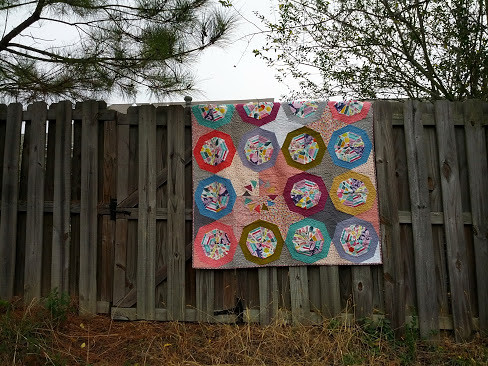
4. Spinning stars. My sister LOVES it by the way. So does my Dad and Stepmom. They were all blown away. It makes me happy to think of it on their couch.

Spinning Stars {and Geese}

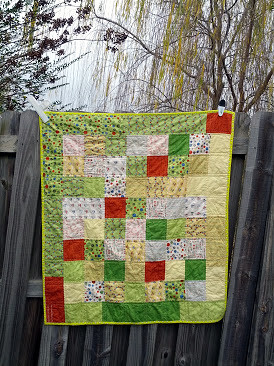
5. Scootin' Squares. A quilt donated to the Salvation Army. I hope this made a little 4 year old boy happy.

Scootin' Squares

6. Geaux Baby quilt for friends. I finished this one just under the wire because I wanted to take it to New Orleans and gift it in person. Full post is pending but here is a peak...


Geaux Baby quilt


I also did lots of other small projects:


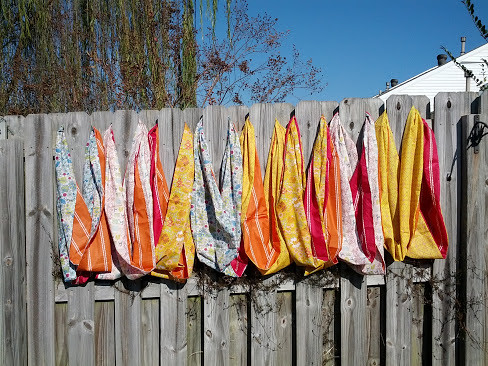
8. Lunch bags for the frog festival
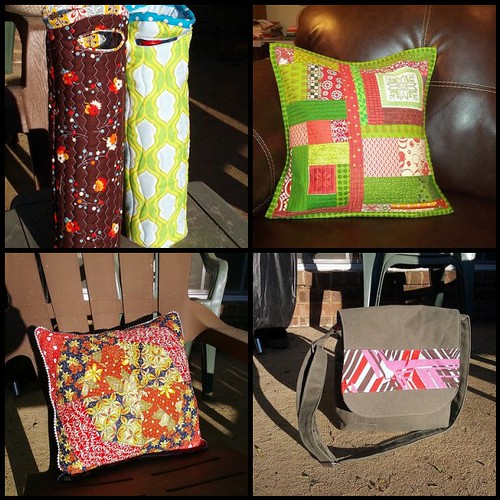
9. Last couch pillow.
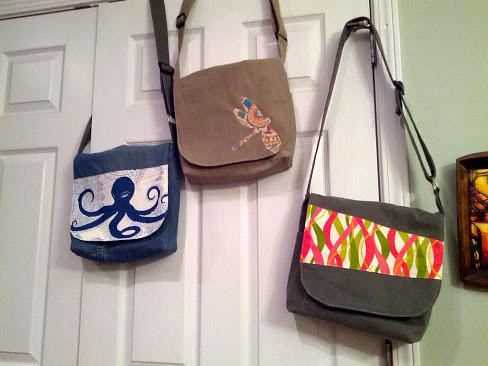
10. Commissioned messenger bags for a coworker (see the picture below after numbers 11 and 12), two cousins and my aunt

bags, bags, bags

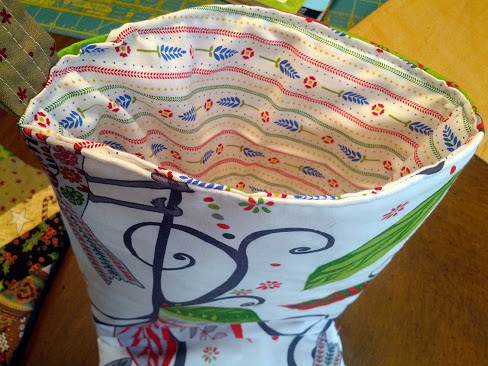
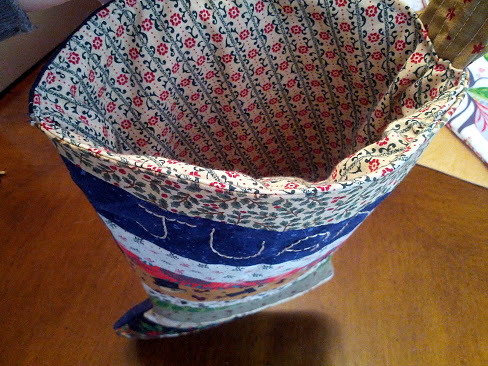
11. Wine totes for lab Christmas gift exchange
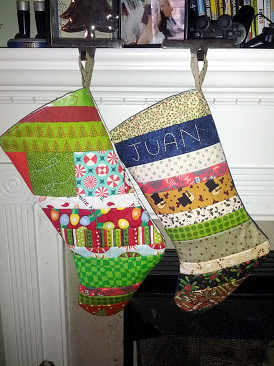
12. Christmas pillowcovers

Recent finishes

13. 16 figure 8 scarves. Much loved by all the ladies. A great mass production idea for Christmas prezzies.

All the figure 8s

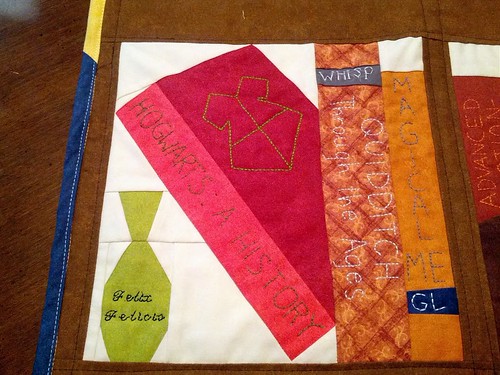
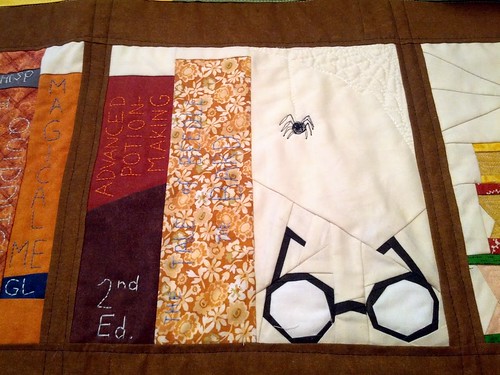
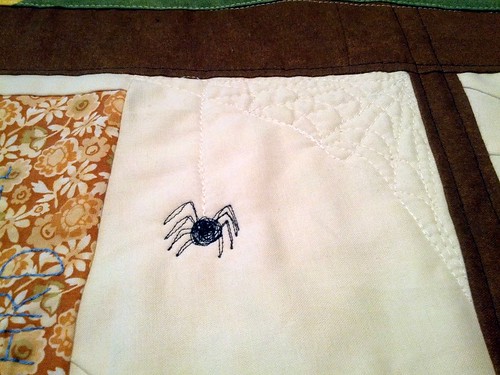
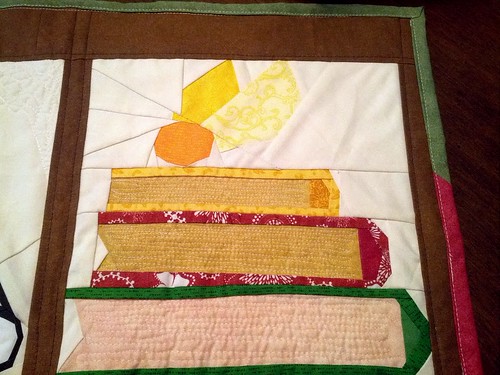
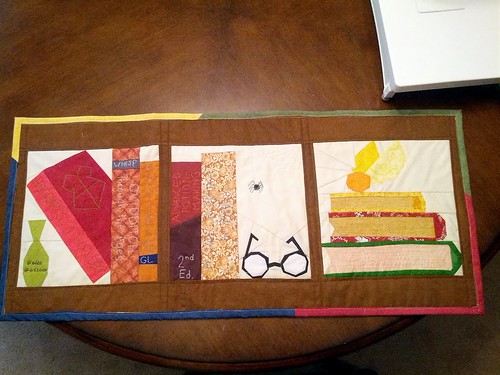
14. Harry Potter bookshelf miniquilt. A Christmas gift for Kim. Read the full post.

HP bookshelf

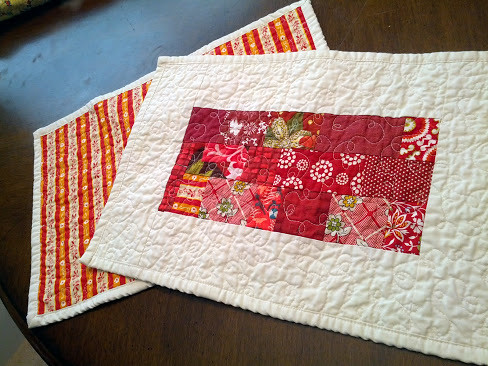
15. Two scrappy placemats for a wedding gift for a coworker.  I used my favorite method for them. One day I will have to blog about the dimensions.

Red Placemats

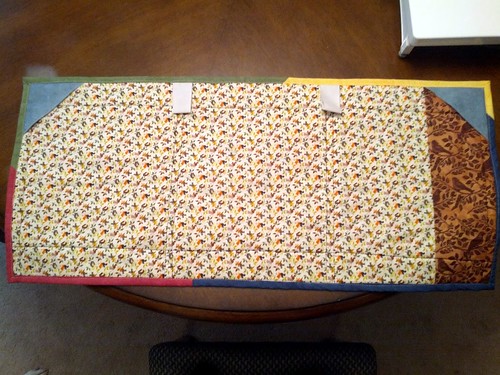
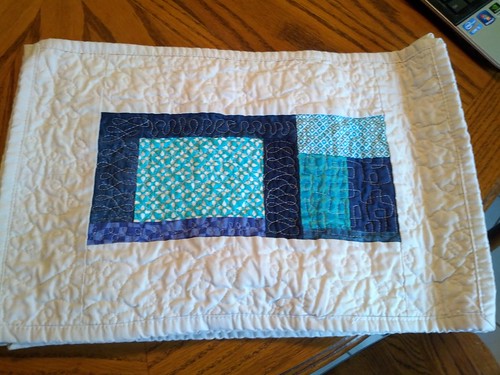
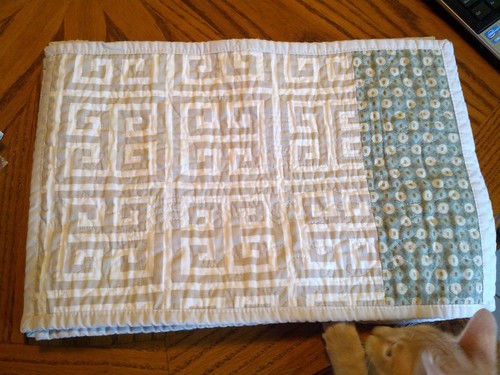
16. 4 placemats for BIL for Christmas. Same pattern but with blue and green scraps. I made the back a little special here with two fabrics for the plate and the silverware.

Blue and green placemats
back of blue and green placemats


Not my cat! But he is a cute little marmie.

17. Stockings for inlaws
Stockings for my inlaws


Ongoing - hopefully these will be done in January. Except the EPP I will just take my sweet time with that.

1. Scrap buster placemats - need 4 for my mom. These just need binding but since she now reads my blog (Hi Mom!) I can't post any pics just yet.

2. Recover 2nd pillow for guest bedroom- EPP project. I've been making slow headway with this one while traveling.


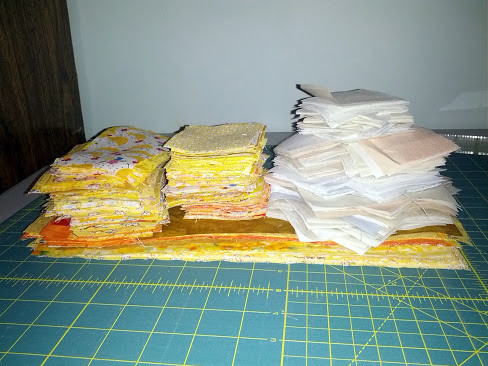
3. Quilt for my sister Allison - she wants a honeycomb pattern with bees - using this pattern and these fabrics. I am finished cutting the fabric.

Fabric piles


No progress- 

1. Nubees block quilt - I realized I need to make three more blocks but I have the backing and sashing fabric ready to go. This is slated for January.


Not started

2. Advent calendar- A little birdie told me that I may be getting one verrry soon.
3.Tree skirt- fodder for Christmas in July 2013

I got pretty much everything I wanted done. I am already brewing ideas for 2013. I wish you all a wonderful New Year's Eve and a Happy New Year! Head on over to Kelsey's to see how everyone else fared with their lists. I am also linking up with the end of the hallway for December at from the blue chair.


Monday, December 24, 2012

Mr. Cat is Evil Cat

Mr. Fat Cat, aka Ron, aka Ron con Pasas (which means rum raisins in Spanish**) likes to cause trouble. He is sleeping on my design...bed? I guess I need a design wall because he couldn't sleep on that.

Me - aw look at that cute sleeping kitty

Ron- I am not sleeping (evil laugh)

Ron - I will kill you in your sleep one day if you attempt to move me.

**And why is he named Ron con pasas? Because my hubs thought he was a girl at first. But after taking him to the vet we found out he was not a girl he had little "raisins" down there ergo Ron con pasas. Of course eventually we had those raisins removed (Bob Barker would be proud) so now he is simply Ron. 

A quick Christmas sewing project

The last time my in laws came to my house for Christmas I bought some stockings and embroidered their initials on the cuff. Well I found out on December 23rd that they took them home and did not bring them back. The stockings at Target were crummy and expensive so of course I just whipped up new ones in a few hours.

Stockings for my inlaws 

To make the stockings I roughly traced one of my stockings onto batting and cut them out. I sewed varying widths of Christmas fabrics strips directly to the batting for the front of each stocking. 
For my MIL I chose bright fabrics and for my FIL I chose darker fabrics (have yourself a manly little Chistmas!)

For Luisa For Juan

I thought it would look nice to embroider a cursive L for Luisa in the diamond shaped square up top. And I wrote out Juan's name in big capital letters.
Close up of embriodery

Embroidered

For the back I chose to use a single piece of fabric. Luisa really liked this print from the Wrenly collection by Valorie Wells. Juan's was the same blue fabric that is on the front (the stripe with the name on it).
Back of Luisa's stocking  

For the inside I found some coordinating prints. Luisa's is a sweet little print from connecting threads. Juan's is some old Christmas fabric from 1994 (wow almost 20 years old) we can pretend that means vintage.
A peak inside Luisa's

A peak inside Juan's

I sewed the outside fabrics right sides together and then turned it right side out. Then I sewed the lining right sides together and stuffed the outside stocking into the lining (right sides should be together). I carefully sewed around the top leaving about 3 inches in the back (where you put the hanging tab) open for turning. I turned the stocking right side out and stuff the lining inside and then pressed the opening closed. Then I quickly made some tabs to hang the stockings. I folded them in half and pinned them into the opening. I would say they are about 5 inches long but I honestly didn't measure. The last step is to topstitch which closes the hole, sews in the hanging tab and makes the top look nice. Ta da!

The whole thing only took about 3 hours so if you still need stockings you still have time!  I have put away my sewing machine and donned my oven mitts for now. Lots of baking and cooking going on over here. Merry Christmas, Feliz Navidad, Happy New Year etc. to you all!

Friday, December 21, 2012

Fabric Haul

My MIL is visiting and wanted to learn to quilt. She started out with some placemats in a simple square pattern. One for her and one for her husband. Their bedroom has the big TV in the house so they like to eat dinner in their room sometimes and watch a movie. These placemats will be a great addition to their TV trays. She has the most unconventional way of doing things but it gets the job done.

Placemats WIP

Bitten by the quilting bug she wants to make 10 more placemats for her dining room using earth tones. We took advantage of the fat quarter shop daily deals. On Tuesday they were having 50% off lots of Free Spirit fabrics. This was the result...

This is what we got for her:
Shelby Pretty Little Things Fat Quarter Bundle Dena Designs for Free Spirit Fabrics 
Skyscraper Grand Hotel Fat Quarter Bundle Jenean Morrison for Free Spirit Fabrics    

Free Spirit Designer Solids Orange
Bella Solids Terrain Cactus
Bella Solids Nautical Blue
Nightshade Evening Spider Blossom  
The Birds and the Bees Apple Swallow Skies
  
And she said I could pick up a few things for myself:

Cocoon Ruby Wine Metamorphosis Yardage - to back a baby blanket and my gold and eggplant bee block quilt 
Chicopee Ladder Dot in black and Fuchia
The Birds and the Bees Aquamarine Meteor Shower 
The Birds and the Bees Sunset Lazy Stripe 
The Birds and the Bees Pool Tree of Life 
The Birds and the Bees Mist Lazy Stripe 
The Birds and the Bees Honey Tree of Life 
The Birds and the Bees Cinnamon Tree of Life 

Flea Market Fancy Grey Eyelet 
Aviary Linen White Feathers 


Subtle Designer Solids Fat Quarter Bundle Free Spirit Fabrics 


Bluebird's Song La Dee Da Fat Quarter Bundle Erin McMorris for Free Spirit Fabrics  

Wrenly Christmas Fat Quarter Bundle Valori Wells for Free Spirit Fabrics - I see a tree skirt and advent calendar in my future

Friday Foodie

With the holiday season upon us, I am sure you are looking for quick and easy dinner suggestions. This recipe is so ridiculously easy, it really doesn't warrant pictures but here you go.

 It is just three ingredients-
Beef brisket
1 package of onion soup mix
14oz can of stewed tomatoes

You will need a piece of beef brisket that just fits into your slow cooker. Go ahead and cram it in there. 
 Sprinkle the onion soup mix on top. I use Lipton's but recently saw a pin where you can make your own onion soup mix. Be forewarned I haven't tried it yet so I can't vouch. I will try it next time because I had the hardest time finding onion soup mix at the store. I had to settle for Beefy onion which I think is the same thing. The final result was the same.

 Pour the can of stewed tomatoes on top. No need to stir.

Put the lid on and heat on low for 6-8 hours, or overnight, or whatever. You can't mess this one up. 

I let mine cook overnight. This is what it looked like this morning. I really wish you could smell this. 

Just remove the meet and cut it or pull it and return to the warm juices to serve. If you want to get really fancy remove the meat and let it cool. Then slice it really thin across the grain. Use an immersion blender to transform the cooking liquid into a sauce that looks like it took hours to make. Return the sliced brisket to the sauce and warm it up before serving.

If you try this recipe I would love to know how it goes for you. Good luck and Happy Holidays!

Tuesday, December 18, 2012

Harry Potter Quilt

Hello world! Or rather, hello tiny fraction thereof that is reading this. The blog has been quiet but I have been busy. I am so excited because I can finally showoff my Harry Potter miniquilt:

HP bookshelf

I made it as a Christmas present for Kim (The brains behind Crafternoon Delight) and I finally finished it and gift it yesterday. Way back in May I stumbled upon the Sewhooked project of doom Harry Potter paper piecing library. And I said, self, this is the PERFECT thing for Kim. We all love HP but she really loves HP.

I chose to make a few paper pieced bookshelves into a wall hanging that she can put above her real bookshelf in her craft room. There are so many great patterns to choose from. I picked ones that had lots of books and other interesting items. One day maybe I will make the full quilted bookcase for my future craft room.

HP bookshelf
Block #1 - has some Felix Felicis (aka liquid luck). Hogwarts: A History, Quidditch throughout the Ages, and Magical Me by Gilderoy Lockhart. I imagine that it is signed on the inside flap by Mr. Lockhart himself. I machined embroidered Felix Felicis on the potion and hand embroidered the rest.

HP bookshelf
Block #2 - The Half-blood prince's copy of Advanced Potion-Making (2nd Edition) and Dumbledore's copy of The Tale of Beedle the Bard. Sorry you can't see the embroidery too well on that book. It wasn't the best choice of fabric. Harry left his glasses on this shelf (probably a spare pair). A little spider made his home in the corner. I think he is Aragog's great-great-great-great-great-great grandson. I machine quilted the spider and the web. Hand stitched the book titles.

HP bookshelf
Here is a close up of Aragog Jr.

HP bookshelf
Block #3 - This block has the first snitch Harry caught sitting on top of more books. You can't see which books these are but the bottom one is clearly The Monster Book of Monsters from the Care of Magical Creatures class. Above that is the standard book of spells 3 and Ancient Runes. I machine quilted the pages.

HP bookshelf - back
Here is the back. I used some HPesque fabrics. I also added different types of tabs to hang the quilt. The binding is colored for each of the houses at Hogwarts.

Linking up with Fabric Tuesdays!